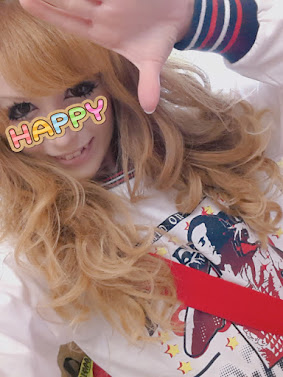
✌✌✌✌Hi gals and pals✌✌✌✌! It's your worst gal, ANDY--- ʕง•ᴥ•ʔง!!
I FINALLY DID IT! I created a blog
It's still "under construction" tho. I'm figuring it out ʕ ◔ᴥ◔ ʔ (?)
ANYWAYs, I was asked to do an eyemake tutorial Ww I wasn't sure what kind of eyemake but I guessed doing my "normal/basic" gyaru eyemake would be the best.
👇👇👇HERE WE GO👇👇👇
So first I'll show you what I used to create this look so you can find similar items and follow this tutorial easily.
You'll need(☞ ͡° ͜ʖ ͡°)☞ :
☞ Something to set your eyebase (I always use the CANMAKE marshmallow powder in MO)
☞ A couple of brown/caramel/beige shadows matt and shimmery (I usually use the ones that come in the mini mint choco palette by makeup revolution)
☞ A white or cream glittery eyeliner ( mine is by collection in the color cosmic stars)
☞ Liquid black eyeliner and pencil (I used to have CANMAKE or DOLLY WINK ones wich are super precise but whatever works for you will do. i have to use these crap ones for now by NYX and Essence)
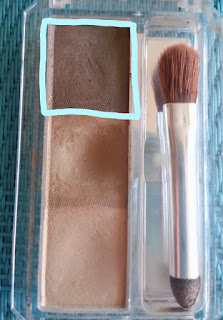
☞ A dark brown matt shadow to draw the namida bukuro line ( my go to is the darkest shade from the CANMAKE brow powder palette)
☞ Lash glue & tweezers (I recomend the DIAMOND BEAUTY lash fix but this ARDELL one gets the job done tooWW)
☞Top lashes --> Decorative Lash n15 ( I only have this pair left T~T)
☞Lower lashes --> Eyemazing n201
1) Set your eyes with your powder/light shadow of choice
2) Pick a shimmery caramel eyeshadow and lay it all over the lid
4) Now it's time for a trick that really does enlarge the eyes imo (specially if u wear circle lenses.) With a black pencil liner draw a small line right in the center of yout waterline below your cl. This creates the ilusion that your eye ends way lower than it really does.
5) Next I do my inner corner and the droopy wing to set the direccion of the liner. Once I've done those two things I feel confident to fill in the rest and complete the upper eyeliner.
7) Then up next it's time to keep enlarging the eyes ᕦ༼ ˵ ◯ ਊ ◯ ˵ ༽ᕤ Ww. We'll draw the namida bukuro with a dark brown shade (better if cool toned)
8) Fill in the eyebag with shimmery eyeshadow and a bit of glitter liner, the shinier the better.
9) it's finally time to apply top lashes~! Try to keep them droopy, apply as close as you can to the liner
10) Aply lower lashes. These ones I feel work better cropped in half (also, if you have patience and time lol I recomend cutting them individually, it looks better)
And that's about it. Aply mascara and retouch the eyeliner where needed and you are done!
---- YAYYYYYYYY└༼ ಥ ᗜ ಥ ༽┘!!!!
Feels good to step out of the comfort zone sometimes!


Wahhhhhh!!!! Welcome to blogging! Thank you so much for this tutorial! I can't wait to try it~ I also can't wait to see what future posts you will make! If you ever need help with anything you can ask me or any of the other gal bloggers! We'll be more than happy to help<3
ResponderEliminarTHANK YOU SO MUCH T v T I feel super welcomed!!!! I'll try to keep it up and active here
EliminarPUtaaaaaa madre amoo tu tutorial Andyyy! Me encanta la marca negra en el medio del ojo ajjajaj abajo de la pupila, es mi manera prefe de hacer el gal make!!! Ww que lindo que vuelvas a bloggeaaaaaaaaaar :3
ResponderEliminarGracias mil amore T3T Ahora tengo que pillarme lenses mas grandes xq con las honey wing me quedo un poco corta ww OJOS CHIHUAHUA YA!!!
EliminarI want to cry cause for so many years I wished that you'll make a blogT0T you're my favorite and I'm gonna be obsessed with this blog I can see it alreadyXDDD
ResponderEliminarThank u so much for this tutorial! I'm gonna try your make asap when I find similar lashes I need to look through the mess I think I have something that will be good for this!
Can't wait for your next post!!!!
I'd love to see your chihuahua eyes and fUNNY HOW I'M forever OBSESSED WITH YOUR BLOG so much that I started stalking your 2016 posts again ww call the police lol i'm a creep
EliminarYAAAAAAAAAAAASSSS
ResponderEliminarYA ERA HORAAAA!!! Toma tuto gyaru *O* Yo ya no tengo lentillas ni me pongo pestañacas (intento dejar descansar las mías propias porque cuando las uso, las uso muy heavys XD) pero me encanta y re-encanta tener por fin el tutorial *O*
Nevada is back pero con otro approach ww a ver a ver x donde salimos TWT GRACIAS X SIEMPRE APOYAR MIS MIERDAS Y ESTAR AHÍ XXXX love u nena
Eliminar(It's Lizzie btw - sorry for some reason I can only comment anonymously!)
ResponderEliminarI'm so happy that you started blogging! I honestly can't wait for your future posts. Just remember to have fun with it <3 And I love your eye make tutorial!